


Secure Sockets Layer (SSL) is a cryptographic protocol that helps provide security and data integrity for data communications over a network. By encrypting your Microsoft Dynamics NAV web services using SSL, you make your data and the network more secure and more reliable.
 Microsoft Dynamics NAV Web Services
and SSL
Microsoft Dynamics NAV Web Services
and SSL
Microsoft Dynamics NAV supports SSL authentication for SOAP and OData web services. The server authenticates itself to the client, but the client does not authenticate itself to the server. When the web service client connects to the Microsoft Dynamics NAV Server instance, the server replies by sending its digital certificate to the client. This certificate contains the server's public encryption key and the name of the authority that granted the certificate. The client verifies the certificate using the authority's public key.
About This Walkthrough
This walkthrough illustrates the following tasks:
- Configuring Microsoft
Dynamics NAV Web Services to Use SSL
- Obtaining an SSL
Certificate
- Importing the SSL
Certificate into the Local Computer Store of the Microsoft Dynamics
NAV Server computer
- Granting
Permissions to the Certificate's Private Key to Microsoft Dynamics
NAV Server
- Obtaining the
Certificate's Thumbprint
- Configuring the Access Control
List and the Web Services Ports for SSL
- Verifying the
Configuration
- Restart the Microsoft
Dynamics NAV Server Instance
Prerequisites
To complete this walkthrough, you will need:
- Microsoft Dynamics NAV 2013 with a developer
license.
- The makecert.exe tool (Certificate Creation
Tool) for creating SSL certificates.
The makecert.exe generates certificates for testing purposes. It is available with Microsoft Visual Studio and Microsoft Windows SDK. For more information, see Certificate Creation Tool (Makecert.exe) in the MSDN Library.
 Note
NoteThe makecert.exe tool is only required if you do not already have an SSL certificate and you want to create a certificate for test purposes.
Story
Victor, who is a business systems developer at CRONUS International Ltd., knows that his implementation of web services applications for Microsoft Dynamics NAV is unlikely to pass a company security audit unless he encrypts sensitive data that is transmitted over the company intranet. He decides to protect web services communication with SSL.
Configuring Microsoft Dynamics NAV
Web Services to Use SSL
The first step is to prepare Microsoft Dynamics NAV to use SSL. This involves configuring the relevant Microsoft Dynamics NAV Server instance to specify SSL.
You can configure Microsoft Dynamics NAV Server instances with the Microsoft Dynamics NAV Server Administration Tool or Microsoft Dynamics NAV Windows PowerShell Cmdlets. For more information, see Managing Microsoft Dynamics NAV Server Instances.
The following procedure uses Microsoft Dynamics NAV Server Administration tool to configure the Microsoft Dynamics NAV Server instance.
To configure the Microsoft Dynamics NAV Server instance to use SSL
-
Choose the Start button, and in the Search programs and files box, type Microsoft Dynamics NAV Administration, and then choose the related link.
-
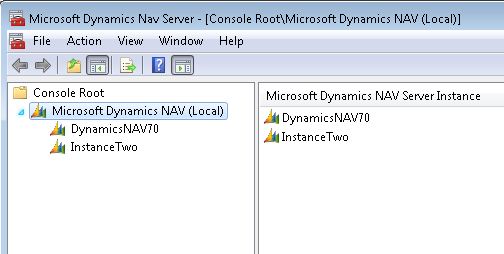
In Microsoft Dynamics NAV Server Administration tool, in the left pane, under Console Root, expand the node for the Microsoft Dynamics NAV Server computer. This is typically named Microsoft Dynamics NAV (Local), which is the local computer.
The Microsoft Dynamics NAV Server instances on the computer appear in the left pane and center panes.
-
In the left pane, choose the relevant instance to display settings for that instance in the center pane.
-
At the bottom of the center pane, choose Edit.
-
To configure SOAP web services to use SSL, expand the SOAP Web Services tab, and then select the Enable SSL option.
Make a note of the port that is used by SOAP web services. You will need the port number later on in this walkthrough.
-
To configure OData web services to use SSL, expand the OData Web Services tab, and then select the Enable SSL option.
Make a note of the port that is used by OData web services. You will need the port number later on in this walkthrough.
-
Choose Save at the bottom of the center pane.
-
In the right pane, under Actions, choose Login Account.
-
Make a note of the service account information. You will need this information later on in this walkthrough.
Obtaining an SSL Certificate
The certificate is a file that Microsoft Dynamics NAV Server uses to prove its identity and establish a trusted connection with the client that is trying to connect. In a production environment, you obtain an SSL certificate from a certification authority. Some large organizations may have their own certification authorities, and other organizations can request a certificate from a third-party organization. In a test environment, if you do not have certificate, then you can create your own test certificate by using the makecert.exe tool as described in the following procedure.
In the following procedure, you use the makecert.exe tool to create a test certificate file (.cer) with a private key file (.pvk), and then generate a personal information file (.pfx) from the two files. You will use the .pxf in the next procedure for importing the certificate on the computer running Microsoft Dynamics NAV Server.
| Note |
|---|
| If you have a certificate, then you can skip this procedure and continue to Importing the SSL Certificate into the Local Computer Store of the Microsoft Dynamics NAV Server computer. |
To create a test SSL certificate using the makecert.exe tool
-
On the computer that is installed with Microsoft Visual Studio 2010 or Windows SDK, create a folder called My Certificates for working with and storing certificates.
You can work on the same computer that is running Microsoft Dynamics NAV Server or a different computer.
-
Open the command prompt as follows:
If your computer is installed with Then Microsoft Visual Studio 2010
- Choose the Start button, choose All
Programs.
- Choose Microsoft Visual Studio, choose Visual Studio
Tools, and then right-click Visual Studio Command Prompt
and choose Run as Administrator.
Microsoft Windows SDK
- Choose the Start button, choose All
Programs.
- Choose Microsoft Windows SDK, choose Microsoft
Windows SDK, and then right-click Windows SDK Command
Prompt and choose Run as Administrator.
- Choose the Start button, choose All
Programs.
-
At the command prompt, change to the folder that you created for the certificates. For example, type
cd\My
Certificates
, and then press Enter. -
To create the SSL certificate with a private key file, type the following command.
 Copy Code
makecert -r -pe -n "CN=Nav Test Cert" -b 01/01/2012 -e 01/01/2014 -sv NavTestCert.pvk NavTestCert.cer
A certificate file called NavTestCert.cer and a private key file called NavTestCert.pvk are created in the temporary folder.
 Tip
TipIf you are working on the computer running Microsoft Dynamics NAV Server, you can use the following command to create and install the certificate, so you can skip the next procedure for importing the certificate. makecert -r -pe -n "CN=NavTestCert" -b 01/01/2012 -e 01/01/2014 -ss my -sr localmachine -sky exchange -
To generate a personal information exchange (.pfx) file from the NavTestCert.cer and NavTestCert.pvk files, type the following command. Substitute mypassword with a password of your own.
Copy Codepvk2pfx -pvk NavTestCert.pvk -spc NavTestCert.cer -pfx NavTestCert.pfx -po mypassword
This creates a file called NavTestCert.pfx file in the temporary folder. The file is assigned a password of by the
pooption. You will use this password when you import the certificate into the local machine. -
If you are not working on the computer running Microsoft Dynamics NAV Server, then copy the .pfx to the Microsoft Dynamics NAV Server computer.
Importing the SSL Certificate into
the Local Computer Store of the Microsoft Dynamics NAV Server
computer
Once you obtain a certificate, you must import it into the local computer store on the computer running Microsoft Dynamics NAV Server. The certificate file will have the extension .cer or .pfx.
To import an SSL certificate into the local computer store
-
On the computer running Microsoft Dynamics NAV Server, choose Start, and then choose Run.
-
In the Open box, type mmc, and then choose OK.
NoteThis procedure assumes that you do not already have the Certificates snap-in installed in Microsoft Management Console. If the Certificates snap-in is already installed, skip steps 3 to 7 and go to step 8. -
On the File menu, choose Add/Remove Snap-in.
-
In the Add/Remove Snap-in dialog box, choose Certificates, and then choose Add.
-
In the Certificates snap-in dialog box, choose Computer account, and then choose Next.
-
In the Select Computer dialog box, choose Local computer, and then choose Finish.
-
In the Add/Remove Snap-in dialog box, choose OK.
-
In the left pane of the console, double-click and expand the Certificates (Local Computer).
-
Right-click Personal, point to All Tasks, and then choose Import.
-
On the Welcome to the Certificate Import Wizard page, choose Next.
-
On the File to Import page, choose Browse, locate your certificate file, for example NavTestCert.pfx.
If the certificate is in a personal information exchange file (.pfx), set the box next to File name to Personal Information Exchange (*.pfx;*.p12), and then browse for the certificate file.
-
Select the certificate file, and then choose Open, and then choose Next.
-
If prompted for a password, type the password on the Password page, and then choose Next.
-
On the Certificate Store page, choose Place all certificates in the following store, and then choose Next.
-
Choose Finish, and then choose OK to confirm that the import was successful.
Granting Permissions to the
Certificate's Private Key to Microsoft Dynamics NAV Server
If the certificate has a private key, then you must give the service account of Microsoft Dynamics NAV Server access to the private key.
To grant access to the certificate’s private key to the service account for Microsoft Dynamics NAV Server
-
In the left pane of MMC, expand the Certificates (Local Computer) node, expand the Personal node, and then choose the Certificates folder.
-
In the center pane, right-click the certificate that you imported, choose All Tasks, and then choose Manage Private Keys.
-
In the Permissions for private keys dialog box, choose Add.
-
In the Select Users, Computers, Service Accounts, or Groups dialog box, in the Enter the object names to select box, type the name of the service account for Microsoft Dynamics NAV Server, and then choose OK.
-
On the Security tab, under Allow, select Full Control and Read, and then choose OK.
Obtaining the Certificate's
Thumbprint
The thumbprint is a string of hexadecimal characters that identifies the certificate. You use the thumbprint when you configure the web service's port to use the certificate. To perform this task, you continue working in the Certificates snap-in in Microsoft Management Console.
To obtain the certificate's thumbprint
-
In the left pane under Console Root, expand the Certificates (Local Computer) node, expand the Personal folder, and then choose the Certificates folder
The center pane displays all the certificates.
-
Right-click the certificate that you imported, and then choose Open.
-
In the Certificate dialog box, choose the Details tab.
-
Scroll through the list of fields, and then choose Thumbprint.
-
Copy the hexadecimal characters from the box, and then paste them in a text editor, such as Notepad. These characters make up the thumbprint.
-
In the text editor, delete all spaces from the thumbprint string.
For example, if the thumbprint is
c0 d0 f2 70 95 b0 3d 43
17 e2 19 84 10 24 32 8c ef 24 87 79
, then change it toc0d0f27095b03d4317e219841024328cef248779. -
Keep the file open or save it. You will use the thumbprint later on.
Configuring the Access Control List
and the Web Services Ports for SSL
An access control list (ACL) is part of the Windows security infrastructure and features. The ACL controls who can access resources on a computer. For more information, see Access Control Lists.
| Note |
|---|
| These procedures use the netsh tool (netsh.exe) for configuring the HTTP server. The netsh tool is supplied with Windows 7 and Windows Server 2008. By default the netsh tool is located in the c:\Windows\System32 folder. |
To configure the ACL
-
On the computer running Microsoft Dynamics NAV Server, open a command prompt as an administrator as follows:
- From the Start menu, choose All Programs, and
then choose Accessories.
- Right-click Command Prompt, and then choose Run as
administrator.
- From the Start menu, choose All Programs, and
then choose Accessories.
-
At the command prompt, type the following command to change to the Windows\System32 directory.
Copy Codecd\Windows\System32
-
To view the ACL for the web services ports to determine if any entries are already using the relevant host name and port, type the following command:
Copy Codenetsh http show urlacl
Each entry is listed by the
Reserved URLfield, which has the formathttp://hostname:port.hostnameis the name of the computer running the service andportis the port number the service runs on. A '+' (plus sign) in theReserved URLfield represents localhost, which indicates the computer that you are working on.By default, SOAP and OData web services in Microsoft Dynamics NAV use ports 7047 and 7048, respectively, and connect to a Microsoft Dynamics NAV Server instance named DynamicsNAV70. The default reserved URL entries for these services are:
http://+:7047/DynamicsNAV70/andhttp://+:7048/DynamicsNAV70/. -
You must delete any entries that use the same port as the SOAP or OData web services.
To delete an entry, type the following command:
Copy Codenetsh http delete urlacl url=http://hostname:Port/NAVserver/
Substitute
Portwith the port number of the SOAP or OData web service andNAVserverwith the name of the Microsoft Dynamics NAV Server instance.For example, to delete the default entries for SOAP and OData, use the following two commands:
Copy Codenetsh http delete urlacl url=http://+:7047/DynamicsNAV70/
Copy Codenetsh http delete urlacl url=http://+:7048/DynamicsNAV70/
-
To register the ports for the SOAP and OData web service with https, type the following command for each service:
Copy Codenetsh http add urlacl url=https://hostname:port/navserver user=DOMAIN\user
Substitute the following options with the proper values:
Option Description hostnameThe name of the computer running Microsoft Dynamics NAV Server. Use
+for localhost.portThe port that is used by the web service.
navserverThe name of the Microsoft Dynamics NAV Server instance to use with the web service. The default is DynamicsNAV70.
DOMAIN\usernameThe domain and user name of the service account for Microsoft Dynamics NAV Server. If the service account for Microsoft Dynamics NAV Server is Network Service, then use "NT AUTHORITY\NETWORK SERVICE".
For example, if the service account for Microsoft Dynamics NAV Server has the domain ABC and the user name xyz, and then the command for the SOAP web service is as follows:
Copy Codenetsh http add urlacl url=https://+:7047/DynamicsNAV70 user="NT AUTHORITY\NETWORK SERVICE"
If the service account for Microsoft Dynamics NAV Server is Network Service, then the command is as follows:
Copy Codenetsh http add urlacl url=https://+:7047/DynamicsNAV70 user="NT AUTHORITY\NETWORK SERVICE"
-
To verify that your port has been registered, repeat step 3.
To configure the port to use the SSL certificate
-
At the command prompt, type the following command to view the current port configurations:
Copy Codenetsh http show sslcert
All port bindings to SSL certificates are listed. Each entry is indicated by the
IP:portfield, whereIPis the IP address that uses the port (0.0.0.0 indicates all IP addresses) andportis the port number. -
If SSL is already configured on the address and port that you want to use for SOAP or OData web services, then use the following command to delete the entry:
Copy Codenetsh http delete ssl ipport=ipaddress:port
Substitute
ipaddressandportwith the IP address and port number of the entry that you want to delete.For example, to delete the entry on the default SOAP port, use the following command:
Copy Codenetsh http delete ssl ipport=0.0.0.0:7047
-
To bind an SSL certificate to the SOAP or OData web service port, use the following command:
Copy Codenetsh http add sslcert ipport=ipaddress:port certhash=thumbprint appid {id}Substitute the following options with the proper values:
Option Description ipaddressThe IP address that can use the web service. Use
0.0.0.0to include all IP addresses.portThe port that is used by the web service.
thumbprintThe certificate thumbprint that you pasted to NotePad previously.
idA 32-digit hexadecimal number that identifies the Microsoft Dynamics NAV application. The id must be in the format {NNNNNNNN-NNNN-NNNN-NNNN-NNNNNNNNNNNN). If you do not know the appid, then use any value, such as {00112233-4455-6677-8899-AABBCCDDEEFF}.
For example, the following command binds a certificate that has the thumbprint c0d0f27095b03d4317e219841024328cef248779 to port 7047 for all IP addresses:
Copy Codenetsh http add sslcert ipport=0.0.0.0:7047 certhash=c0d0f27095b03d4317e219841024328cef248779 appid {00112233-4455-6677-8899-AABBCCDDEEFF}
Restart the Microsoft Dynamics NAV
Server Instance
You can use the Microsoft Dynamics NAV Server Administration Tool to restart the Microsoft Dynamics NAV Server instance.
To restart Microsoft Dynamics NAV Server
-
In Microsoft Dynamics NAV Server Administration tool, in the left pane, under Console Root, choose the Microsoft Dynamics NAV Server computer.
-
In the center pane, choose the Microsoft Dynamics NAV Server instance that you have configured, and then in the right pane under Actions, choose Restart.
-
After the instance restarts, close Microsoft Dynamics NAV Server Administration tool.
Verifying the Configuration
You should now be able to use web services that are encrypted with SSL. To verify this, type the following URL in the address bar for your browser.
https://localhost:7047/DynamicsNAV70/WS/services
The page lists any web services that have been published.
Next Steps
You can now try out any other SOAP web service and OData walkthroughs with SSL. The only change that is required for using these walkthrough with SSL is that you use "https" instead of "http" in your URLs.